logo
FAQ

Project.

No Mess
Cooling System Flush Kit
FAQs
By Brian Burke
eMail: bjburke@wowway.com


No-Mess Cooling System Flush     Flushing the cooling system in your car is one of the easier maintenance tasks.  All you need is a Prestone Flush & Fill kit, a garden hose, and a place to make a mess.  The Flush & Fill kit works great, but you will get coolant all over the ground.  Very messy.   I wanted to flush the cooling system in my garage, so I devised a setup that does not make a mess.   See the following pages for details.  

itemsWhat you will need:        
A & B - From an extra radiator cap that fits your radiator.  
C - Three rubber washers that fit a garden hose.  
D - Threaded nut from a 1/2" electrical conduit fitting.  
E -
Plastic right-angle fitting.  One end should have threads that fit item D.  The other end should fit into item F.  
F -
A foot or two of plastic tubing.  3/4" OD by 5/8" ID.  
G - A plastic coupler that fits into item F.

Other items:  

  •   Prestone Flush & Fill kit (or similar)
  • A cheap garden hose.  You will use this as a drain line.  You will need 2 drain lines.  If you have a 20-foot run to the drain, get at least 40 feet of hose.
  • A knockout that will punch a 7/8" hole.  You can find these at Home Depot and Menards in the electrical department.  Get a knockout that punches a hole for 1/2" conduit fittings.
  • Several feet of 3/8" OD by 1/4" ID plastic tubing.
  • A short piece of radiator hose that fits onto the drain at the bottom of the radiator.
  • A couple of hose clamps.
Procedure:  Disassemble the radiator cap.  No, not the original cap, the extra one you bought!  You need two parts --  the cap itself and the seal, as pictured here:       cap
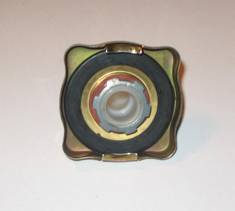
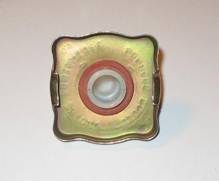
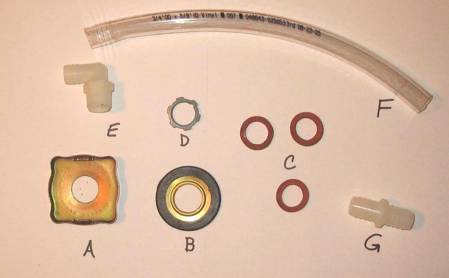
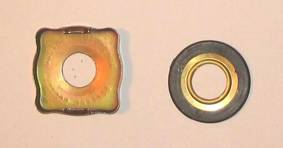
After extracting the parts pictured above, use the knockout to punch a 7/8" hole through the center of each.  You can see that I have already done that.
Now put one of the rubber washers onto the right-angle fitting:
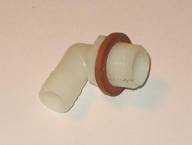
Next, insert the fitting into the cap and install another rubber washer:
Now install the seal, and then the last rubber washer:

Lastly, screw on the electrical nut:
Your cap assembly is now complete!

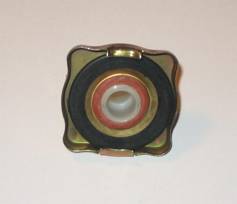
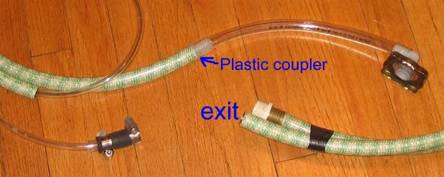
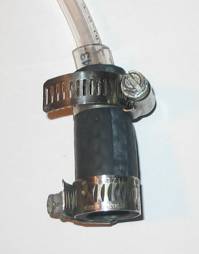
Next you can assemble the drain line that connects to the drain fitting on the bottom of the radiator.  You may need to use your imagination a little, depending on the style of the drain fitting.  Rather than trying to attach a hose to the fitting, you could get a bucket and attach a drain line to the bucket.  Then just put the bucket under the drain fitting. My drain line is made of 3/8" OD tubing and a piece of radiator hose.  You can also see an intermediate-size piece of plastic tubing I used to make the 3/8" line fit snugly into the radiator hose.  A hose clamp holds it together.  The other hose clamp is used to keep the line attached to the radiator fitting.  Here's a couple pics:
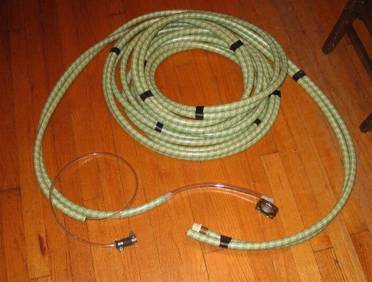
Final Assembly
Here is a picture of the final assembly. There are 2 drain lines, and I have taped them together at regular intervals to make it easier to handle.

<---- Here is a close-up:     The 3/8" drain tube is just inserted into the garden hose.  No need to seal the connection.  Just shove it in about a foot or so.   DONE!

To use your new flush setup:  
1.   Install the Flush & Fill kit per the instructions on the package.  
2.   Attach the modified cap to the top of your radiator.  
3.   Attach the drain line to the fitting on the bottom of your radiator.  
4.   Run the drain lines to a suitable drain.  
5.   Flush the cooling system per the directions on the Flush & Fill kit.