Introduction That's actually a very reasonable price for a handmade custom unit. If I had gone in Mike Julian's direction I would have saved a lot of hours. But why copy a 40 year old radiator design. Both the design and manufacturing technology have moved on. Also when the Volvo radiator silts up or springs a leak, I will recycle the parts get another one at my local auto store. Does anyone believe 240's will disappear from the road in the next decade?
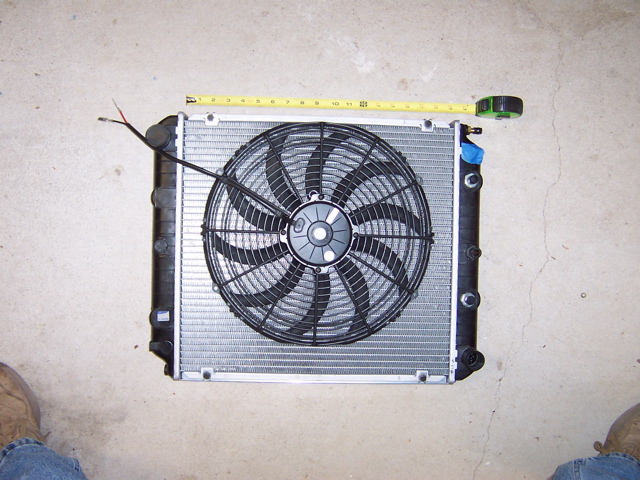
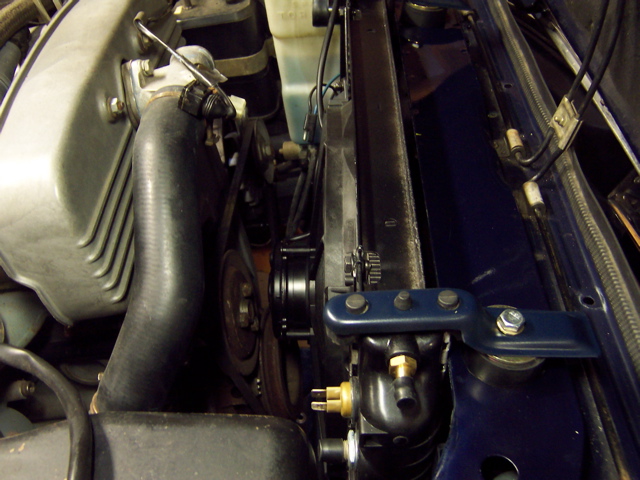
Because the Volvo radiator is slightly taller than the stock one, the top edge must be set back from the top radiator cross member moving it closer to the front of the engine. Because it is a cross flow design there are no mounting points on the sides for a fan. For these reasons, a slimmer electric fan with different mounting points must be substituted. There are a wide range of choices in the 12 to 16 inch diameter sizes that will match or outperform the stock fan and fit the Volvo radiator. And again they are no more expensive than overhauling the original. Not surprisingly, Mirafiori members had already led the way down this radiator conversion path. Pete Angel was stuffing Scirocco radiators in 124's before there was an internet. Eladio Garcia posted part numbers and pictures of the Volvo/Spider conversion on his web site in 2003. Ralph DeLaurentis had done the conversion and shared his experience here. Robert McNabb recently bought Ralph's set up after reading about it on Mira he too provided me with useful details and support. My own contributions are fairly modest. I've used a 940 bottle in a Spider for perhaps the first time, found a little more clearance down below and provided some clean up of the upper mount details. Installation Spal sells a wide variety of mounting feet and brackets to fit their units and has a good web site, While the fans themselves are overpriced in the Spal webstore but the mounting hardware is actually cheaper when purchased from Spal directly. The existing Spider lower radiator bracket under the center is reused. Clearance between the lower hose outlet and the sway bar is close. I used the original Fiat rubber bracket pad and reinforced the bottom of the radiator with two pieces of aluminum extrusion to give the needed half inch clearance.
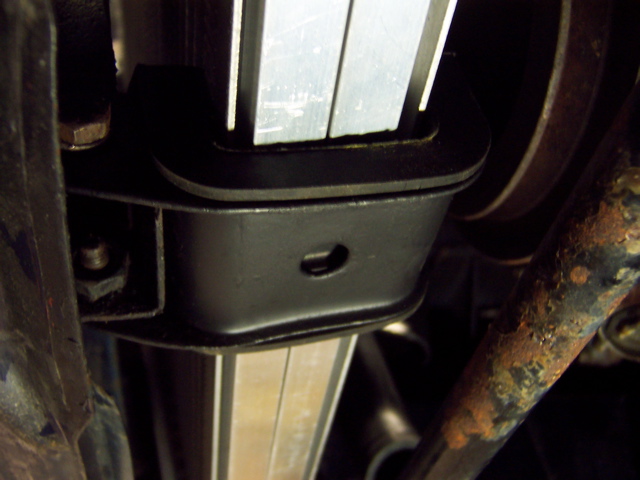
Like most modern radiators it is quite fragile. The joints between the plastic tanks and aluminum tubes are easily damaged by pulling on the hoses, The aluminum fins are one grade above food wrap and easily crushed. However, the half inch wide cooling tubes are actually multiple tubes extruded side by side and the fins are brazed onto them were each touches. The radiator appears capable of spreading the load of a single lower mount. Because the Fiat lower bracket was not designed to carry the full weight of the original radiator and will pivot off its two small bolts, I have some concern about its sagging down, I plan to run a support strap from my oil pan guard to its underside when I get the guard back on, But others report no problems in longer term road use. The empty radiator and fan combo is eleven pounds lighter than the stock Fiat units and it appears to hold less coolant.
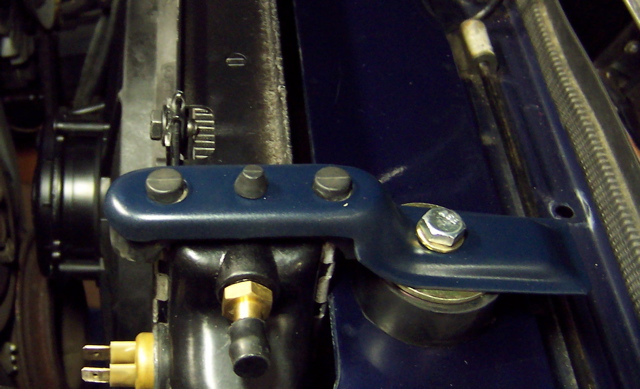
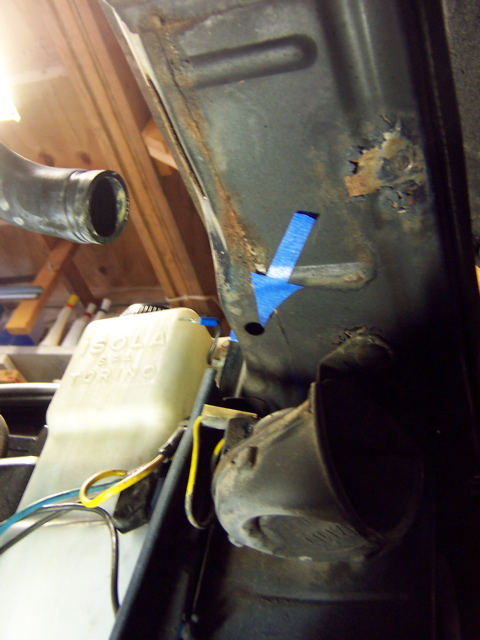
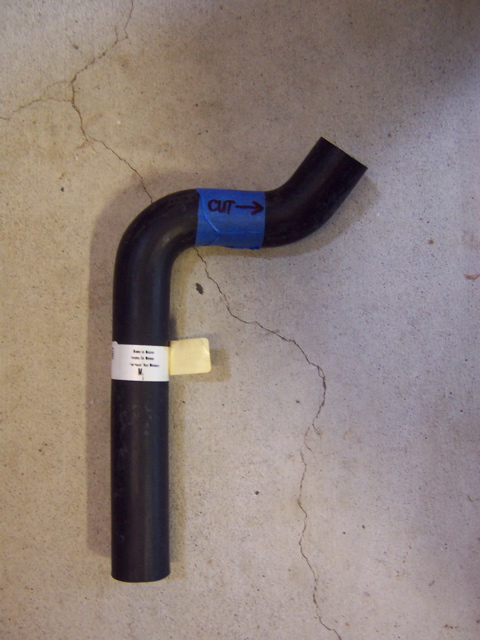
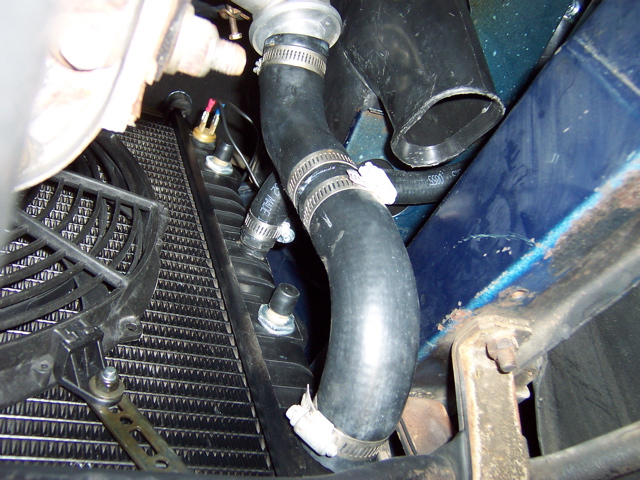
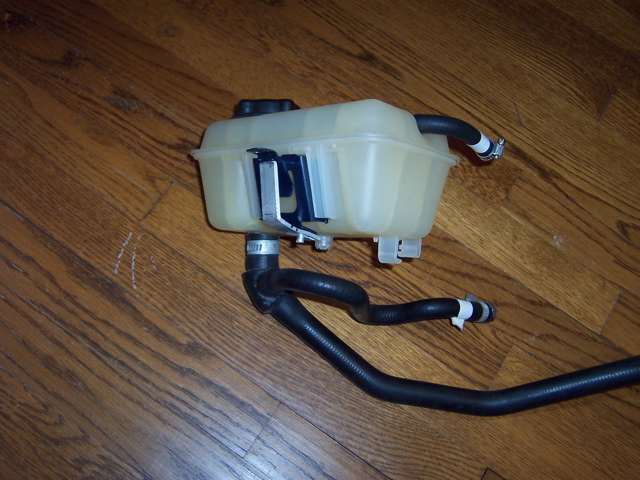
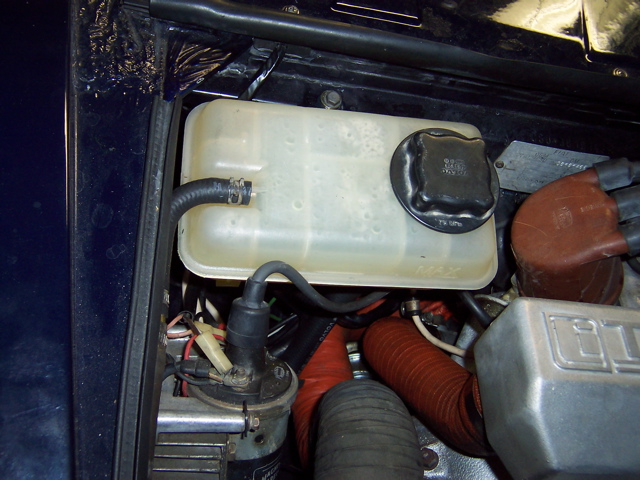
The radiator is slightly taller than the top cross member. Spacers must be placed between the cross member and the top mounts. I used the rubber plugs from "Expand Tite" kits to raise the brackets up by the required 3/4". A large plated washer from the kit sits between the brackets and the rubber, which is supplied with the correct hole size. The top side of the cross member is flat, light gage sheet metal and will not take a concentrated load, The rubber donuts also serve to spread the load out a bit. The upper radiator hose is cut down from Auto Zone hose of unknown origin. I simply followed Eladio Garcia's part number recommendation. (picture five) His recommended lower hose part number did not work for me. Since the Fiat upper hose is replaced, it is available to supply the needed 90 bend at the bottom of the radiator outlet. The Volvo's lower radiator hose connection projects straight out, lacking the 90 degree metal elbow of the stock radiator. I used a 1 1/4" hose splice to connect the bent end of the upper hose with the existing lower hose on the thermostat. The Volvo radiator does not have a radiator cap. A separate expansion tank takes the place of the Fiat coolant recovery bottle. A 5/8" line links the middle of the passenger side radiator tank with a fitting on the underside of the bottle. A second 5/16" line links a brass nipple on the top of the radiator with a similar nipple on top of the bottle to bleed any air out of the radiator. The 940 bottle itself is rectangular and fits in the space vacated by the Fiat bottle. It must be mounted as high in the engine compartment as possible because the coolant level in the bottle is the coolant level in the head as well. The max coolant level in my bottle is at the same level as the lip running across the back of the engine compartment.
The 740 bottle comes with a simpler bracket setup. I used the 940 bottle because it was more compact and I needed the space for my Legend Turbo installation. I used a stock Volvo sensor in a new gasket that came with the radiator. The sensor is held in the radiator tank by nothing more than its slightly hourglass shape and the compression of the gasket, The used Volvo parts specialist I dealt with recommended some RTV to seal it in place. This mounting design came from Volvo so it has stood the test of time. I do not know what year or model Volvo my particular sensor came from. I've been told that it was made in a range of temps but I see only one new one out there. Mine was made by Klixon and was marked "92-97" which I assume are the actuation temps in C. The radiator came with a white nylon plug to substitute for the sensor in the tank opening.,
To facilitate the conversion, I've made liberal use of plastic hose splices in the lower radiator hose and in the two lines to the bottle. I don't recommend them as a long term solution,. Unfortunately, I was not able to find a lower hose with the right geometry and end diameters. A hose to connect the outlet with the water pump directly does appear to be available for those running internal thermostats and I will post details when I have tested it. The online Gates hose catalog is a wonderful parts substitution resource.
The stock Volvo temp sensor works like it was made for my car. Kicks the fan on at a slightly lower temp. Could be the result of the sensor being mounted at the top of the radiator rather than the bottom. It kicks off just a few degrees above the thermostat opening. Temp gauge needle moves in a narrow range between 189 and 195 indicated. The pressurized coolant bottle does a better job of getting air out of the system. The coolant level has stayed rock steady since the original bleeding was done. However, until the thermostat opens for the first time, it is still a struggle to get air out of the external thermostat. For this reason and to clean up the engine compartment, I plan to convert to the in-head thermostat configuration. Pay close attention to the coolant level. If the tank is properly positioned it will start cold with the coolant at minimum and as it heats, the coolant will approach maximum. If too much coolant is added cold, the tank will overflow. It vents under the cap. There is no overflow line, so a mess will ensue. Remember this when you are routing wiring in the vicinity. And speaking of cap, recall that the bottle is now pressurized. When you twirl off the handy plastic tank cap, you are actually taking off the radiator cap and releasing the pressure. Don't do it while coolant is hot
|